

SENSE CUR 4600 (pdf)
SENSE CUR 4600 (pdf)
Description:
Access level: public
Reference: SDOC-498608282-1367
Download: PDF
Access level: public
Reference: SDOC-498608282-1367
Download: PDF
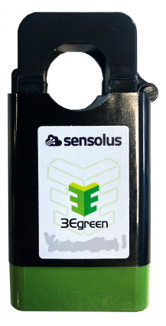
SENSE CUR 4600
BLE DC Current Clamp Sensor
www.sensolus.com | info@sensolus.com
Clip-style DC current sensor with BLE connectivity for
non-invasive current monitoring. Features
configurable thresholds and user-replaceable battery.
Ideal for battery-powered equipment and DC circuit
monitoring.
Bluetooth Low Energy
Up to 5 years battery life
Flame retardant
71 × 36 × 36mm
80g (2.8 oz)
Current Measurement
Measurement Range
0.3A ~ 20A DC
Resolution
100mA DC
Accuracy
±3% (5-20A DC)
Maximum Voltage
900V DC
Current Type
DC only (cannot measure AC)
Sampling Interval
Every 30 seconds
Connectivity
Technology
Bluetooth Low Energy (BLE)
Transmission Range
Up to 35 meters (38 yards)
Advertisement Period
2 seconds at +0dBm
Physical Characteristics
Dimensions
71 × 36 × 36mm
Weight
80 grams (2.8 oz)
Material
NYLON Flame Retardant (UL-94V0)
Design
Clip-style (no glue or screws required)SENSE CUR 4600
BLE DC Current Clamp Sensor
www.sensolus.com | info@sensolus.com
Power
Battery Type
CR2477X 3V Lithium battery
Battery Life
Up to 5 years
User Replaceable
Yes
Configuration
Configurable Features
•
Forward current threshold
•
Backward current threshold
•
Configured via Sensolus mobile app
Environment & Certifications
Operating Temperature
-20°C to +50°C
IP Rating
Not rated for outdoor use
Certification
CE (Europe)
Installation manual for SENSE CUR 4600 (pdf)
Installation manual for SENSE CUR 4600 (pdf)
Description:
Access level: public
Reference: SDOC-498608282-1382
Download: PDF
Access level: public
Reference: SDOC-498608282-1382
Download: PDF
Installation manual for SENSE CUR 4600
www.sensolus.com | info@sensolus.com
February 2025
Install the batteries
Remove the green bottom lid of the clamp sensor.
Place the battery with the - pole facing down.Installation manual for SENSE CUR 4600
www.sensolus.com | info@sensolus.com
February 2025
Replace the green bottom lid.
Install in the machine
This sensor is for direct current (DC) measurements only.
Open the machine, locate the battery and identify the plus and minus poles. Attach the sensor to one of the cables connected
to the plus or the minus pole of the battery. Only one sensor is needed and it does not matter which cable you choose. Make
sure the sensor is installed with the correct orientation:
• Minus pole wire: The arrow on the sensor points towards the battery
• Plus pole wire: The arrow on the sensor points away from the battery
Link the sensor to the tracker
Use the Sensolus mobile app to link the sensor to a tracker. Make sure you have the latest version of the app installed.
Open the Sensolus smartphone app. Select the tracker from the asset list. Click Link sensor at the bottom of the page in the
Advanced section.Installation manual for SENSE CUR 4600
www.sensolus.com | info@sensolus.com
February 2025
Click the Pair sensor button.
Scan the QR code on the sensor. The sensor slots will be automatically assigned.Installation manual for SENSE CUR 4600
www.sensolus.com | info@sensolus.com
February 2025
Verify that the sensor is linked. Both charging and uncharging slots should be filled.
Adjust threshold valuesInstallation manual for SENSE CUR 4600
www.sensolus.com | info@sensolus.com
February 2025
The threshold values can be adjusted for testing purposes using the Sensolus mobile app. Make sure you have the latest
version of the app installed.
Go to More → Sensor manager.
Search for the device you want to edit and click on it to see the details.Installation manual for SENSE CUR 4600
www.sensolus.com | info@sensolus.com
February 2025
Click the wheel icon to open the configuration settings. Enter the forward and backward current threshold values, then click
the save icon to store the settings.
To determine appropriate threshold values, consult the Sensolus documentation centre.
Important limitations
Keep the following limitations in mind when using the SENSE CUR 4600:
Limitation
Details
Measurement interval
The measurement interval is 30 seconds, and time reporting
resolution is in minutes. Short current flows cannot be accurately
counted.
No live measurements
Live current measurements are not available in the platform.
No graphing
Current vs time graphs are not available in the platform.
DC only
The sensor cannot measure alternating current (AC) or voltages.
Indoor use only
The sensor is not IP rated and cannot be used outdoors.
Fragile components
The clamps contain fragile ferrite cores. Do not drop or hit the
sensor.
Single wire only
Do not put both the + and - wire into the clamp at the same time.
The positive and negative magnetic fields will cancel each other out,
resulting in no measurement.